Newest Addition to the walls

Easiest project I’ve ever done. Fabric. Embroidery hoops. Construction paper and painters tape to get the layout just right. Finished in 1 1/2 naps 🙂

IMG_5176

IMG_5175

IMG_5177

I bought all the fabric for about $18 with enough left to *maybe* make pillows if I ever learn how to use the sewing machine Aunt Kari gave me. {ahem. Ms. V when you’re in town *wink*wink*} The fabrics came from Hancock and a local place called Bernina in Stitches. The hoops came from JoAnn’s when we were in Memphis. How I miss JoAnn’s and Ben Franklin Crafts. They were $.99 and $1.50 a piece. Soooo pretty easy, pretty cheap craft.

Image

Pretty Wreaths are Like Pearls…

…No Southern girl should ever be without them! I love the way a front door looks with a pretty wreath hanging on it. It can brighten up a house. Just like pearls brighten up a bad day 🙂

*I’m back at blogging and still getting into the swing of remembering to take pictures of everything. Forgive me*

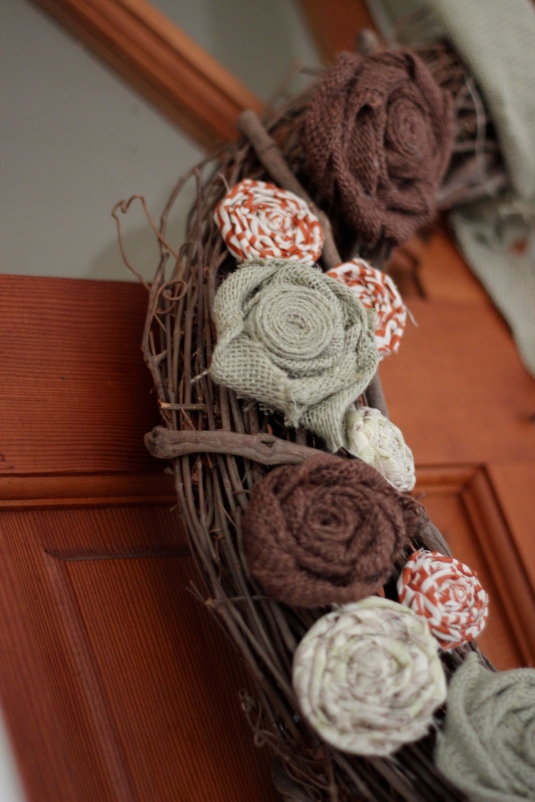
I got a simple grapevine wreath at Mamaw’s rummage sale for $1 and bought some pretty fabrics from JoAnn’s (love JoAnn’s.) I also had some brown and green burlap. I bought the brown with the fabric and had some green left over from my “Sigh No More” kitchen art. Burlap is so cheap and quickly becoming a staple in my crafting.  

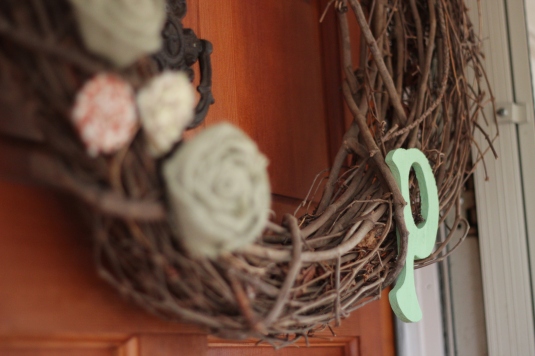
I went to work making rosettes. There are so many tutorials out there but Shanty2Chic is one of my favorite blogs and I always go back to their’s.  Except I cheat and don’t iron the fabric first; I just fold as I go and it works just fine.  After I got all my rosettes finished I just laid them out on my grapevine until I found a good look and glued. I used tacky glue but a glue gun would have worked well too!


*Of course I couldn’t neglect a “P”

ON a side note, this little man turns one tomorrow! 

Mumford in My Kitchen. The Gospel in My Heart

Who doesn’t love Mumford? Seriously. If you’ve never heard them, stop. NOW. And listen. I love the lyrics to “Sigh No More.” Possibly  my favorite Mumford song.  “Sigh No More” was inspiration for my most recent project. Take a look ….

I got the frame for 3.99 at Goodwill (I think. Although it’s kind of a blur.)

I then used these materials to transform it… 

I just spray painted my frame

While this guy hung out away from the fumes

Then, I used distress ink until I got the frame the way I liked it, cut the letters out with my silhouette and just like pie, it was done and hanging in my kitchen to remind me of the freedom found in love!

Appropriately I read this in Romans today, “therefore, no condemnation now exists for those in Christ Jesus, because the Spirit’s law of life in Christ Jesus has set you free from the law of sin and of death.” The beauty of freedom is found in Romans 8.

A Sign for Mama

For the first time I can remember I did not celebrate with my mama. Sent her this instead. Image

Crafted by yours truly. If you are looking to buy something similar (and much better!) check out my pal Allison’s etsy shop. Definitely a different style than this but same kind of “deal” if ya know what I mean. Hand painted goodness.

I’m still Creating. Are you still reading?

I'm still Creating. Are you still reading?

For a sweet friend relying on the hope of Jesus.

Image

What’s Been Goin’ On?

My friend Patrick got married in January (I NEVER said I did things on time) and I’ve had this idea in mind for him and his new wifey for awhile. She’s adorable but I haven’t met her; facebook told me. He’s a brainiac and we survived high school together. He deserves a nice gift for putting up with me during that phase and being my friend.

So, I made him this… No tutorial but I used my Silhouette! Whoa. I cannot wait to start making things for baby.

In other news,

We spent a weekend in G-Burg.  I did a lot of this….

He did convince me to shell out some dough and set sail on the Titanic. Unfortunately, he went down with the ship. But I survived to start the Salvation Army.

Shout out to Mama P and Papa Al for the time share. We had a blast!

We enjoyed a Sunday afternoon at Biltmore and boy was it cold. Thanks to Missy and Brad for the passes!

We found out we are going to be Auntie Allie and Uncle Cliffo to our first nephew!

My excited b-i-l (sorry for the fuzzy picture, camera phone) shares the news with friends and family. My poor sis will be spending the hottest summer I can remember preggo. Luke is coming late July and I canNOT wait to meet him and squish his little face.

Cliff and I made it to year two of marriage! Whoa buddy…

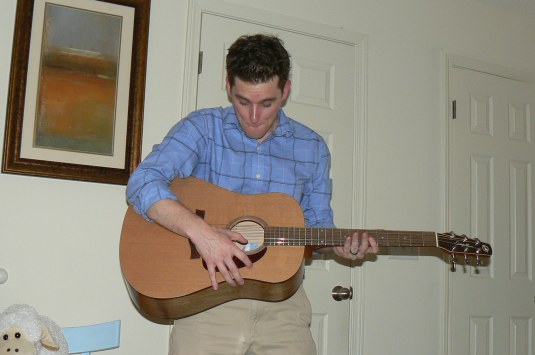
I surprised Husband Pyles with a new guitar…..what a selfless gift from me {wink wink nudge nudge}

He surprised me with an iPod and iTunes gift card. Mine broke and I’ve been wanting a new one but never said a word. Glorius.

A group of us threw Allison and Steve a great baby shower, complete with chili cheese dogs and corn hole. Looking forward to meeting Finn in August! Al {the  pregnant one in the middle} is one of my favorite people around… you can tell she’s a lot of other people’s favorite too!

Cliff’s been in two weddings the last two months… I only got a picture at one. [Are we ever serious?]

I have gone from this….To this….

Are you for real? I still have about 5 months to go? Mama says I’m going to topple over if my belly gets too big. Now, that would be funny and I would upload a video for you!

It’s times like these I miss my best friends who have spread their wings.
I’d love to hear Sammy Sam make some ridiculously inappropriate joke about my baby or belly.

If Jessie Joy lived here we would laugh and laugh about all the crazy things that are happening while I’m preggo and then giggle about baby names and cute little clothes.

If Niff were here, she’d bring me back to reality and tell me to get over it and stop complaining. But she’d do it in a funny way that wouldn’t hurt my feelings. Then, we’d get Sonic and look at non-lame baby gear.

And  my precious Leanne. She would sit and listen and tell me about how great Jesus is going to be through me to this baby. She always says it like it is and has the faith of Moses leading the Egyptians or Abraham leading his son Isaac up the mountain as a sacrifice.

And then there’s Cliff’s family who live the horrendous 8 or 9 hour drive away. Let’s not even go there!

{Don’t judge me if I’m getting teary thinking about you, it’s the hormones} I’m glad you folks are where you are but I’m being a little selfish right now…. get in the car and come here, please?


There’s a really great music festival going on right now in JC. I’m too tired to even think about going. This madness starts Sunday….

I’ll be preoccupied for the next 6 weeks.

An Easy Vase Redo

What a beautiful day it is today! I’ve got my windows open and the sun shinin’ in. I’ll be heading out in a bit to enjoy the sunshine. This morning, though, I had the itch to craft.

I haven’t done any projects in quite awhile so when I have the itch, I go with it!

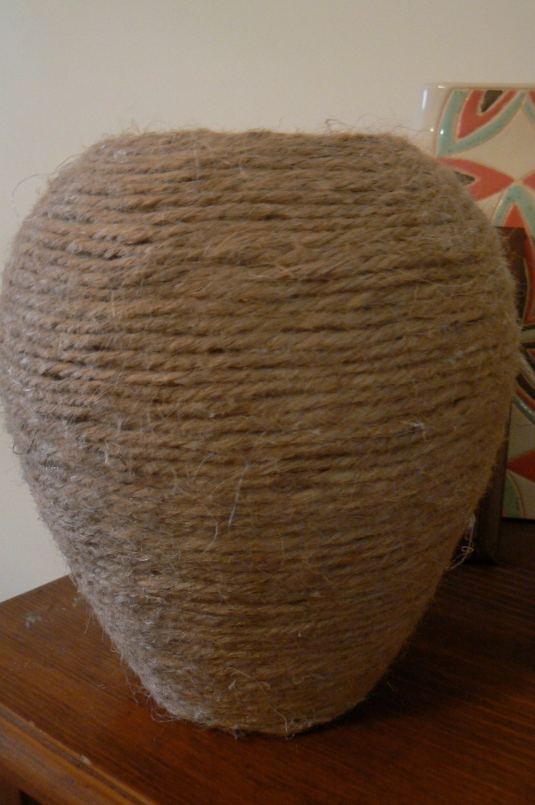
About a month ago, I got this horrible vase for 97 cents at my local Goodwill. The guy wanted $3 for it and I said, “not a chance,” and haggled him down! Loved the shape, hated the color.

Just look at the close  up! Ick….

At first, I wanted to spray paint it. Then decided that jute might look nice. I’ve had this jute from Hobby Lobby for about 2 years. Got it from Hob Lob with a 40% off coupon. Cost me like $1.75 for the whole thing.

so, I just took my glue gun.

And glued away.

About 4 episodes of Pretty Little Liars later…

A brand new vase! For only $2. . . . score! Still not sure where I’ll put it, but for now

That was my bouquet from our wedding. I used silk flowers and am glad to be able to keep it. One day, I may put them in our children’s room.

Do you like it with the flowers?

What should I put in it?

I linked to these parties:

Tip Junkie handmade projects


Today’s Creative Blog

Let Your Light Shine

With my rosettes, I made this….

a cute little lamp

I had this lamp. I liked it, but it wasn’t great. And don’t even get me started on that ugly table. I’m also working on the little “table” it sits on. . . post coming soon.

First, I lined the bottom of the lamp with brown ribbon my brother in law had given me for my crafts. (Sorry, no pic. That part’s easy)

Then, I simply followed Little Birdie Secrets rosette tutorial to make my rosettes. * I didn’t have fabric glue and didn’t want to spring the $8 for it, so I tried tacky glue. Tacky glue does NOT work, don’t do it! Instead, use your glue gun and be really careful to glue where it won’t show. 

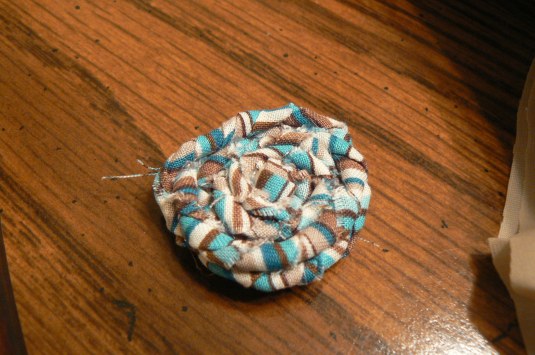
If you read my post on rosettes, you may remember my blue, brown and cream rosette. It’s my 2nd favorite, after the orange and cream. I did this rosette a bit differently than the tutorial. I wanted it to be more of a flower. I just sort of made “big twists” and glued A LOT so that I could get the fabric showing throughout.

They didn’t look very good together… I knew it was risky but wanted to try anyway. Sad day….

I used tape to decide where I would place my rosettes. I did not want to glue them before knowing I would like their positioning. 

After I had them positioned where I wanted them with the tape, I made a small dot on my lampshade to tell me where the center should be. (Can you see them? They are there, and tiny…)

I used my hot glue gun again to glue the rosettes down.

My b-i-l also gave me that upholstery tack. I love it in the cream and orange flower!

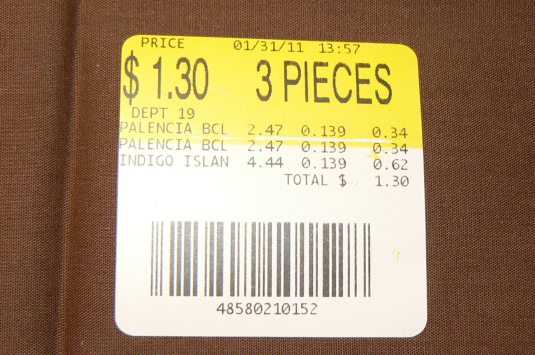
I did this project for $1.30… the cost of my fabric! 

I still have about 4 inches of each fabric. Wal-Mart will cut fabric in increments as small as 4 inches. I got 5 of each.

Here she is!


TaDa!

14 “You are the light of the world—like a city on a hilltop that cannot be hidden. 15 No one lights a lamp and then puts it under a basket. Instead, a lamp is placed on a stand, where it gives light to everyone in the house. 16 In the same way, let your good deeds shine out for all to see, so that everyone will praise your heavenly Father. – Matthew 5:14-16


Linking to:


Lovely Crafty HomeA Little Knick Knack

A Sneak Peak

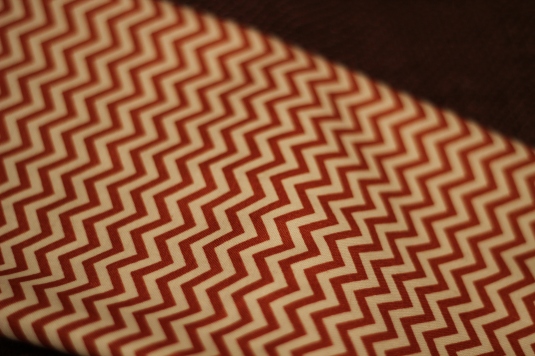
I’ve been working with some fabric to make these…


Come back on Friday to see what I made with them. A project that totaled $1.30 and left me with fabric.

Which rosette is your favorite?

What crafty things will you do with your rosettes?

My First Big Redo

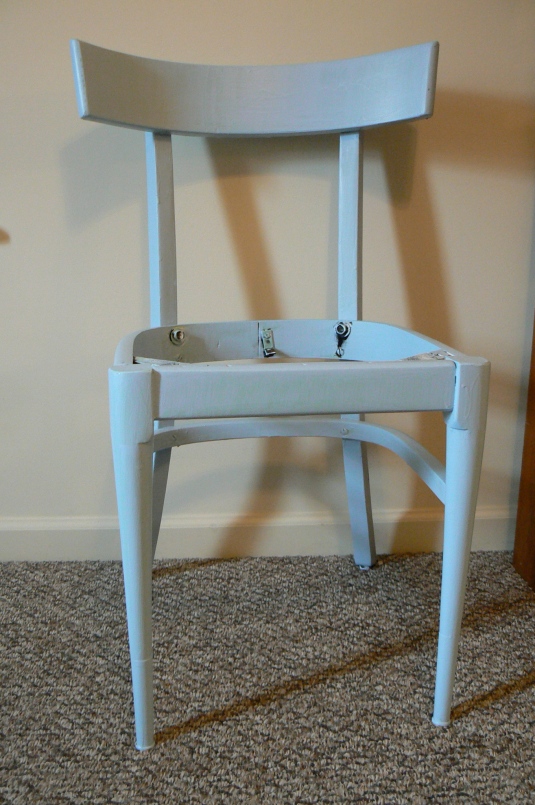
I purchased two of these uglies at a shop in Roan Mountain for $5 each. Same place I got my window pane.

Man, are they ugly or what?!?! And stinky! When we moved into our new apartment and sent them right to my mama’s basement until I could work on them!

The first thing I did, was take the seat cushion off. What a mess! Stripped screws, rusted nails and a very stubborn gal who would not give up on getting them out… what a combo!

I threw them on my mama’s make shift painting station and sanded them down… there was some kind of varnish on them that made them very slick. After I sanded the first one, my sweet aunt mentioned that they  may have lead paint. So, I didn’t sand the second one. I’ve had them out for a few days now and the paint seems fine.

Then, I primed them with primer my mama already had.

After I primed them, I painted them right up with paint we already had as well! BUT, I forgot to get a pic. So sorry!

While the chairs were drying, I removed the first layer of the seat cushion only to find there was more!

Uggh! I did not remove the final layer of grossness. I wiped it down really really well and went with it and it turned out fine in the end.

Then, I traced my seat cushion onto the batting I purchased from Hancock Fabrics and cut them out with a large bread knife. *If you purchase batting for your seat cushion, make sure you have something to cut it with. It will NOT cut with scissors or small household knives.

After cutting my foam, I glued the foam to the seat. This is not a necessary step, but my foam was thick and I did not want it moving around.

Next step and you may need some help for this one, is to staple your fabric to the seat cushion. . .

Those are my mama’s beautiful hands and we used her heavy duty staple gun.

Chairs were dry and now it was time to attach my cushions
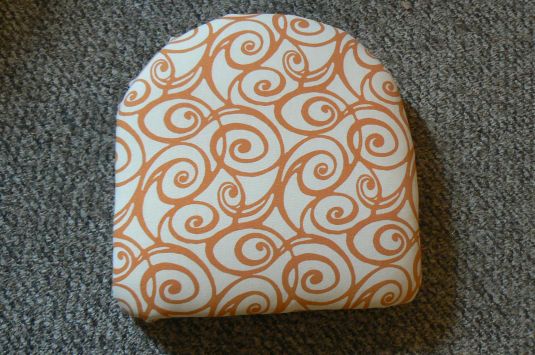
to my chairs

Remember that I told you my screws were stubborn? Well, I did not want to fool with purchasing new ones to fit the hole or make new holes, so I got my old friend Gorilla Glue

I lined my chairs with the glue

Placed my cushions on and put heavy weights on the cushion to hold it down. I also had my papa sit on it for about 45 minutes!

And… Wha La!
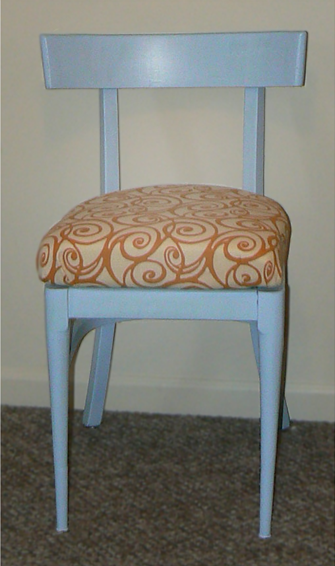
 

Here they are in my living room! Chair 1

Chair 2. Like the “Love Never Fails”? My friend Kristin made it as a wedding gift!

Things I learned during this project:

*Spray paint is worth the extra money, if you’ve got it!
* Do NOT let your paint drip, hence the spray paint.
*Letting mamas help make crafting a bunch more fun!

Cost breakdown:

-Chairs $5 each
-Fabric $9 for one yard
-Batting for seat cushions $9
-Paint and primer free
– Wood Gorilla Glue $5 but I’ll use it again!

Total: $28

I enjoyed spending time with my mama working on this project. This is what I’m working on next…

Let’s all remember the great MLK today. “Returning violence for violence multiplies violence, adding deeper darkness to a night already devoid of stars…. Hate cannot drive out hate: only love can do that” Love someone a little extra today!


Linking up to:

Metamorphosis Monday at Between Naps on the Porch

Making the World Cuter


Previous Older Entries